タイガー!タイガー!じれったいぞー!(SE編)

AS400, Java, JavaEE, JSF等の開発、習慣など。日々の気づきをまとめたブログ(備忘録)

ネットワーク・スループット調査

久しぶりの投稿になってしまいました。。。

最近は、ほとんどプログラミングが出来ておらず、インフラ系の仕事がメインになっております。 その中で、新たに学んだことを、備忘録として記しておきたいと思っております。

今回は、iperfを使って、ネットワークのスループットを計測する機会があったので、まとめます。

そもそも、スループットとは何かということで、次のような意味になります。

スループットとは、単位時間あたりの処理能力。コンピュータが単位時間内に処理できる命令の数や、通信回線の単位時間あたりの実効転送量などを意味する。後者の場合、末端同士の実質的な通信速度(理論値からプロトコルのオーバーヘッド等を差し引いた実効速度)の意味で使われる。(IT用語辞典-eWordより)

コンピュータやネットワーク機器などの性能を評価する指標でもあるとのこと。 この数値が高ければ高いほど、体感速度もアップするというわけか。

同僚からは、iperfが便利!と教えていただいたので、早速使ってみました。 その前に、iperfについては、こちらのサイトで学ばさせていただきました。

www.ccna-navi.com

qiita.com

準備

  • Serverとクライアントが必要なので、PC2台を準備します(今回は、両方Windows10でテスト)
  • PCそれぞれに、iperfソフトウェアをダウンロードし、「C:\tools」に配備しました。

Server側の操作

  • IPアドレス:172.16.10.1
  • Serverとして起動させるために、オプションsを付けてiperfを実行させます。
  • 実行後、Windowsなので、セキュリティ許可の要求が出現しますので、アクセスを許可します。

f:id:no14141:20150926145649j:plain

コマンド結果

C:\WINDOWS\system32>cd c:\tools

c:\tools>iperf -s
------------------------------------------------------------
Server listening on TCP port 5001
TCP window size: 64.0 KByte (default)
------------------------------------------------------------
[256] local 172.16.10.1 port 5001 connected with 172.16.10.2 port 61635
[ ID] Interval       Transfer     Bandwidth
[256]  0.0-10.0 sec   849 MBytes   713 Mbits/sec

Client側の操作

  • IPアドレス:172.16.10.2
  • Clientとしてiperf Serverへアクセスします。オプションcの後にIPアドレスを指定して通信を開始します。
  • 1秒間隔で測定結果を表示させるため、オプションiを1秒として実行します。
  • 結果は、同一ハブ上でのテストのため、10秒の平均が 712Mbits/secという結果になりました。
  • 念のため、ServerとClientを入れ替えてみて、テストして比較した方がいいようです(上り/下り)。

コマンド結果

C:\WINDOWS\system32>cd c:\tools

c:\tools>iperf -c 172.16.10.1 -i 1
------------------------------------------------------------
Client connecting to 172.16.10.1, TCP port 5001
TCP window size: 64.0 KByte (default)
------------------------------------------------------------
[236] local 172.16.10.2 port 61635 connected with 172.16.10.1 port 5001
[ ID] Interval       Transfer     Bandwidth
[236]  0.0- 1.0 sec  83.6 MBytes   701 Mbits/sec
[236]  1.0- 2.0 sec  84.5 MBytes   709 Mbits/sec
[236]  2.0- 3.0 sec  84.7 MBytes   710 Mbits/sec
[236]  3.0- 4.0 sec  85.2 MBytes   715 Mbits/sec
[236]  4.0- 5.0 sec  85.2 MBytes   715 Mbits/sec
[236]  5.0- 6.0 sec  85.2 MBytes   714 Mbits/sec
[236]  6.0- 7.0 sec  85.3 MBytes   716 Mbits/sec
[236]  7.0- 8.0 sec  85.2 MBytes   715 Mbits/sec
[236]  8.0- 9.0 sec  85.2 MBytes   715 Mbits/sec
[236]  9.0-10.0 sec  85.4 MBytes   716 Mbits/sec
[236]  0.0-10.0 sec   849 MBytes   712 Mbits/sec

まとめ

  • スループットを測定できるToolとして、iperfは大変便利!
  • ネットワーク内で2ポイントで調査できるので、その間に低速ハブなどが存在するかどうかも、このツールで見極めることができそうです。

【Zabbix2.4】CentOS7(vagrant)へインストール

ネットワーク上にあるServerやネットワーク機器の死活監視などを行うため、Zabbixという統合監視ソフトウェアが人気のようです。

Zabbixでは、次の監視が可能になるとのことです。

  1. 稼動監視
  2. リソース監視
  3. アプリケーション監視

私もセットアップしたいと思い、とりあえず、vagrant環境のCentOS7へインストールしてみました!

セットアップ手順

1. Vangrant構築

> vagrant box add centOS71min https://github.com/holms/vagrant-centos7-box/releases/download/7.1.1503.001/CentOS-7.1.1503-x86_64-netboot.box

> mkdir C:\vagrant\hosts\centos71_zabbix24

> cd C:\vagrant\hosts\centos71_zabbix24


> vagrant init centOS71min
A `Vagrantfile` has been placed in this directory. You are now
ready to `vagrant up` your first virtual environment! Please read
the comments in the Vagrantfile as well as documentation on
`vagrantup.com` for more information on using Vagrant.

仮想マシンIPアドレス設定

  • 作成されたVagrantfileを編集します。メモ帳などで開き、1行のコメント行を有効にします。
  # using a specific IP.
  # config.vm.network "private_network", ip: "192.168.33.10"  <<< 有効化(#を削除する)

起動

> vagrant up
Bringing machine 'default' up with 'virtualbox' provider...
==> default: Importing base box 'centOS71min'...
==> default: Matching MAC address for NAT networking...
==> default: Setting the name of the VM: centos71_zabbix24_default_1434
_83258
==> default: Clearing any previously set forwarded ports...
==> default: Clearing any previously set network interfaces...
==> default: Preparing network interfaces based on configuration...
    default: Adapter 1: nat
    default: Adapter 2: hostonly
==> default: Forwarding ports...
    default: 22 => 2222 (adapter 1)
==> default: Booting VM...
==> default: Waiting for machine to boot. This may take a few minutes..
    default: SSH address: 127.0.0.1:2222
    default: SSH username: vagrant
    default: SSH auth method: private key
    default: Warning: Connection timeout. Retrying...
    default: Warning: Connection timeout. Retrying...
    default:
    default: Vagrant insecure key detected. Vagrant will automatically
    default: this with a newly generated keypair for better security.
    default:
    default: Inserting generated public key within guest...
    default: Removing insecure key from the guest if its present...
    default: Key inserted! Disconnecting and reconnecting using new SSH
==> default: Machine booted and ready!
==> default: Checking for guest additions in VM...
==> default: Configuring and enabling network interfaces...
==> default: Mounting shared folders...
    default: /vagrant => C:/vagrant/hosts/centos71_zabbix24

c:\vagrant\hosts\centos71_zabbix24>

2. Server接続(127.0.0.1

  • Tera Termを使ってSSHログインします。
host: 127.0.0.1
port: 2222
user: vagrant
pass: vagrant

3. タイムゾーン設定・確認

# timedatectl set-timezone Asia/Tokyo
# timedatectl
      Local time: Sun 2015-06-14 19:51:49 JST
  Universal time: Sun 2015-06-14 10:51:49 UTC
        RTC time: Sun 2015-06-14 10:51:48
        Timezone: Asia/Tokyo (JST, +0900)
     NTP enabled: n/a
NTP synchronized: no
 RTC in local TZ: no
      DST active: n/a

4.各種パッケージのアップデート

# yum -y update

5.SELinuxのdisabled

# vi /etc/selinux/config
  • すでに「SELINUX=disabled」になっていました。

6. ファイアウォール無効化

# systemctl list-unit-files | grep firewall
firewalld.service                           enabled
# systemctl disable firewalld.service
rm '/etc/systemd/system/dbus-org.fedoraproject.FirewallD1.service'
rm '/etc/systemd/system/basic.target.wants/firewalld.service'
# systemctl list-unit-files | grep firewall
firewalld.service                           disabled

7. Zabbix SIAのリポジトリ登録

# yum install http://repo.zabbix.com/zabbix/2.4/rhel/7/x86_64/zabbix-release-2.4-1.el7.noarch.rpm

8. Zabbix関連のパッケージインストール

# yum install zabbix-server-mysql zabbix-web-mysql zabbix-web-japanese zabbix-agent
:
Installed:
  zabbix-agent.x86_64 0:2.4.5-1.el7
  zabbix-server-mysql.x86_64 0:2.4.5-1.el7
  zabbix-web-japanese.noarch 0:2.4.5-1.el7
  zabbix-web-mysql.noarch 0:2.4.5-1.el7

Dependency Installed:
  OpenIPMI-libs.x86_64 0:2.0.19-11.el7
  OpenIPMI-modalias.x86_64 0:2.0.19-11.el7
  apr.x86_64 0:1.4.8-3.el7
  apr-util.x86_64 0:1.5.2-6.el7
  dejavu-fonts-common.noarch 0:2.33-6.el7
  dejavu-sans-fonts.noarch 0:2.33-6.el7
  fontpackages-filesystem.noarch 0:1.44-8.el7
  fping.x86_64 0:3.10-1.el7
  freetype.x86_64 0:2.4.11-10.el7_1.1
  httpd.x86_64 0:2.4.6-31.el7.centos
  httpd-tools.x86_64 0:2.4.6-31.el7.centos
  iksemel.x86_64 0:1.4-2.el7.centos
  libX11.x86_64 0:1.6.0-2.1.el7
  libX11-common.noarch 0:1.6.0-2.1.el7
  libXau.x86_64 0:1.0.8-2.1.el7
  libXpm.x86_64 0:3.5.10-5.1.el7
  libjpeg-turbo.x86_64 0:1.2.90-5.el7
  libpng.x86_64 2:1.5.13-5.el7
  libtool-ltdl.x86_64 0:2.4.2-20.el7
  libxcb.x86_64 0:1.9-5.el7
  libxslt.x86_64 0:1.1.28-5.el7
  libzip.x86_64 0:0.10.1-8.el7
  lm_sensors-libs.x86_64 0:3.3.4-11.el7
  mailcap.noarch 0:2.1.41-2.el7
  mariadb-libs.x86_64 1:5.5.41-2.el7_0
  net-snmp.x86_64 1:5.7.2-20.el7
  net-snmp-agent-libs.x86_64 1:5.7.2-20.el7
  net-snmp-libs.x86_64 1:5.7.2-20.el7
  perl-Data-Dumper.x86_64 0:2.145-3.el7
  php.x86_64 0:5.4.16-23.el7_0.3
  php-bcmath.x86_64 0:5.4.16-23.el7_0.3
  php-cli.x86_64 0:5.4.16-23.el7_0.3
  php-common.x86_64 0:5.4.16-23.el7_0.3
  php-gd.x86_64 0:5.4.16-23.el7_0.3
  php-mbstring.x86_64 0:5.4.16-23.el7_0.3
  php-mysql.x86_64 0:5.4.16-23.el7_0.3
  php-pdo.x86_64 0:5.4.16-23.el7_0.3
  php-xml.x86_64 0:5.4.16-23.el7_0.3
  t1lib.x86_64 0:5.1.2-14.el7
  unixODBC.x86_64 0:2.3.1-10.el7
  vlgothic-p-fonts.noarch 0:20130607-2.el7
  zabbix.x86_64 0:2.4.5-1.el7
  zabbix-server.x86_64 0:2.4.5-1.el7
  zabbix-web.noarch 0:2.4.5-1.el7

9. MariaDBのインストール

# yum install mariadb-server
:
Installed:
  mariadb-server.x86_64 1:5.5.41-2.el7_0

Dependency Installed:
  mariadb.x86_64 1:5.5.41-2.el7_0
  perl-Compress-Raw-Bzip2.x86_64 0:2.061-3.el7
  perl-Compress-Raw-Zlib.x86_64 1:2.061-4.el7
  perl-DBD-MySQL.x86_64 0:4.023-5.el7
  perl-DBI.x86_64 0:1.627-4.el7
  perl-IO-Compress.noarch 0:2.061-2.el7
  perl-Net-Daemon.noarch 0:0.48-5.el7
  perl-PlRPC.noarch 0:0.2020-14.el7

10. MariaDB用の設定

# vi /etc/my.cnf.d/server.cnf

[mysqld]
character-set-server = utf8
collation-server     = utf8_general_ci
skip-character-set-client-handshake
innodb_file_per_table


# systemctl start mariadb
# systemctl enable mariadb
ln -s '/usr/lib/systemd/system/mariadb.service' '/etc/systemd/system/multi-user.target.wants/mariadb.service'


# mysql -uroot
Welcome to the MariaDB monitor.  Commands end with ; or \g.
Your MariaDB connection id is 2
Server version: 5.5.41-MariaDB MariaDB Server

Copyright (c) 2000, 2014, Oracle, MariaDB Corporation Ab and others.

Type 'help;' or '\h' for help. Type '\c' to clear the current input statement.

MariaDB [(none)]> create database zabbix;
Query OK, 1 row affected (0.00 sec)

MariaDB [(none)]> grant all privileges on zabbix.* to zabbix@localhost identified by 'zabbix' ;
Query OK, 0 rows affected (0.00 sec)

MariaDB [(none)]> flush privileges;
Query OK, 0 rows affected (0.00 sec)

MariaDB [(none)]> exit
Bye


# mysql -uroot zabbix < /usr/share/doc/zabbix-server-mysql-2.4.5/create/schema.sql
# mysql -uroot zabbix < /usr/share/doc/zabbix-server-mysql-2.4.5/create/images.sql
# mysql -uroot zabbix < /usr/share/doc/zabbix-server-mysql-2.4.5/create/data.sql

11. Zabbix設定ファイル更新

# vi /etc/zabbix/zabbix_server.conf

DBPassword=zabbix

12. ZabbixのWebインターフェース用設定ファイル更新

# vi /etc/httpd/conf.d/zabbix.conf

php_value date.timezone Asia/Tokyo

13. 各種デーモン起動

# systemctl start zabbix-server
Job for zabbix-server.service failed. See 'systemctl status zabbix-server.service' and 'journalctl -xn' for details.

失敗しました!

こちらのサイトを参考にさせてもらいました。

# rpm -Uvh https://kojipkgs.fedoraproject.org/packages/trousers/0.3.11.2/3.fc20/x86_64/trousers-0.3.11.2-3.fc20.x86_64.rpm
Retrieving https://kojipkgs.fedoraproject.org/packages/trousers/0.3.11.2/3.fc20/x86_64/trousers-0.3.11.2-3.fc20.x86_64.rpm
Preparing...                          ################################# [100%]
Updating / installing...
   1:trousers-0.3.11.2-3.fc20         ################################# [ 50%]
Cleaning up / removing...
   2:trousers-0.3.11.2-3.el7          ################################# [100%]

# systemctl restart zabbix-server


# systemctl start zabbix-agent
# systemctl start httpd

# systemctl enable zabbix-server
# systemctl enable zabbix-agent
# systemctl enable httpd

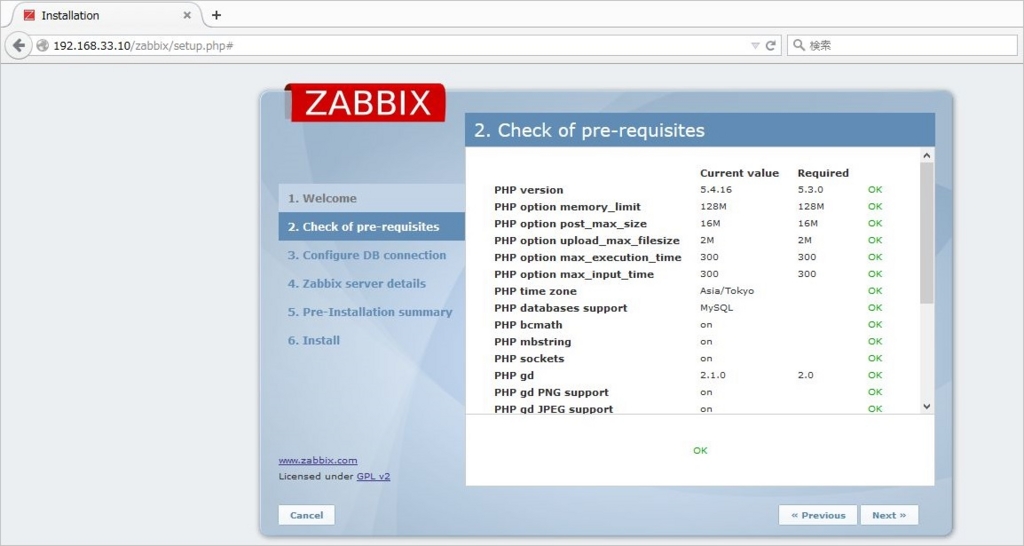
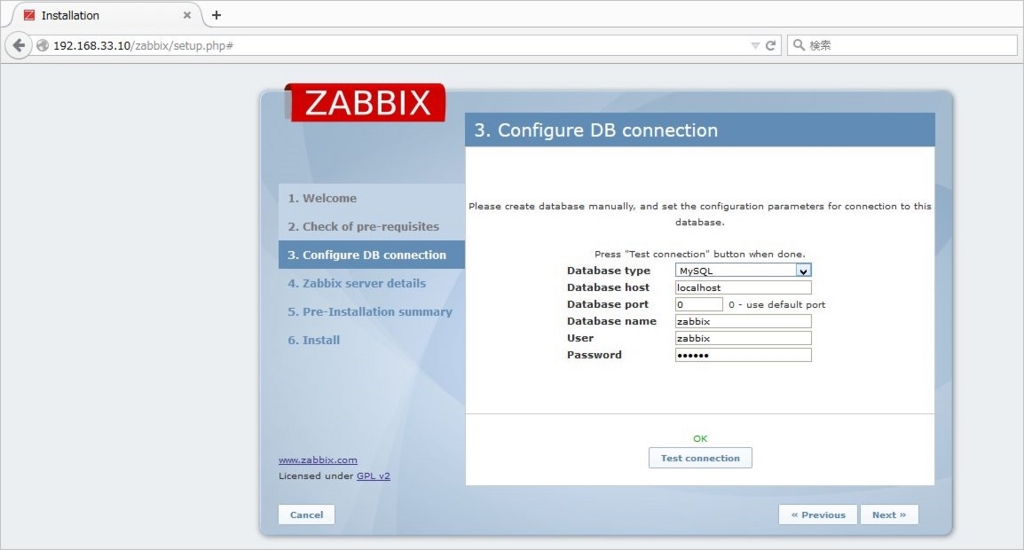
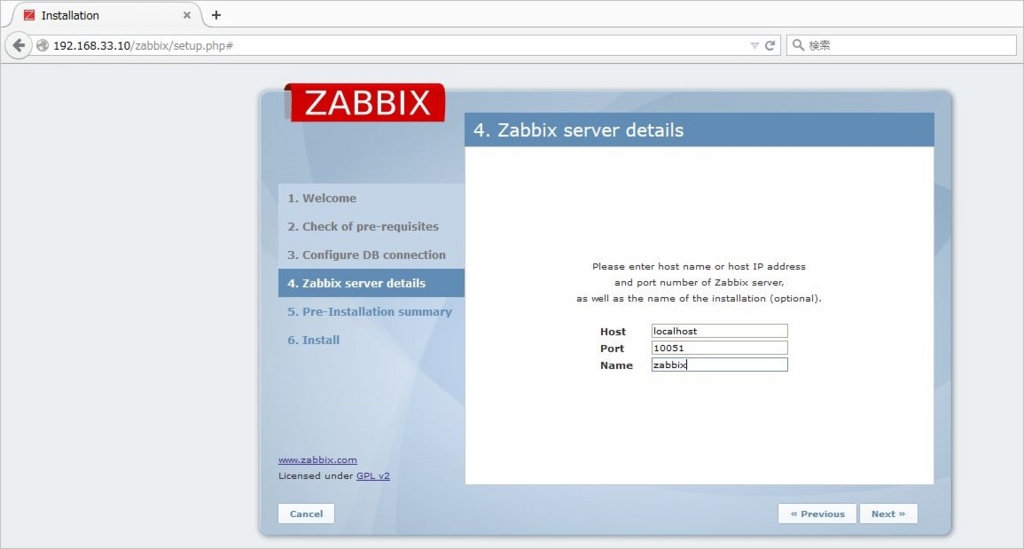
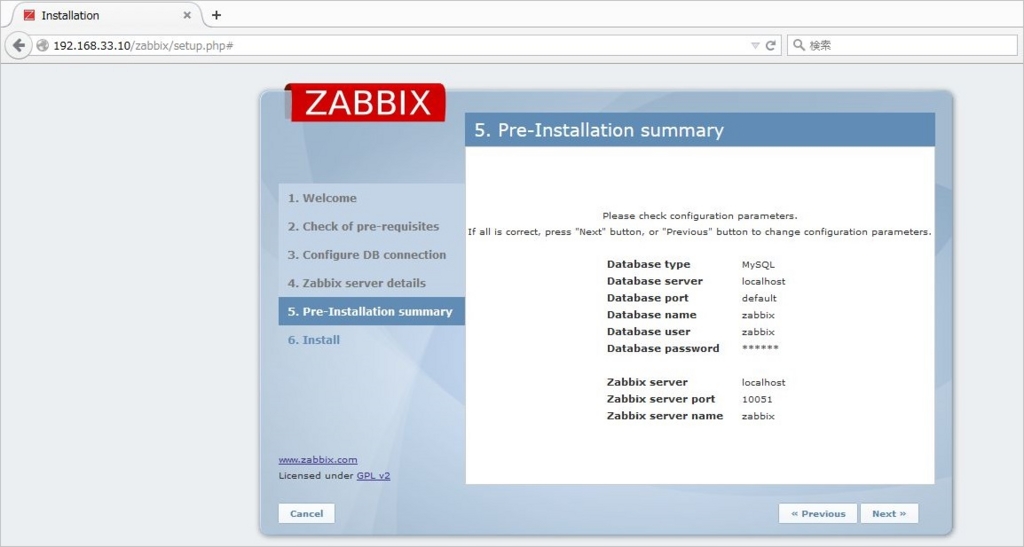
14. Webコンソールへアクセス

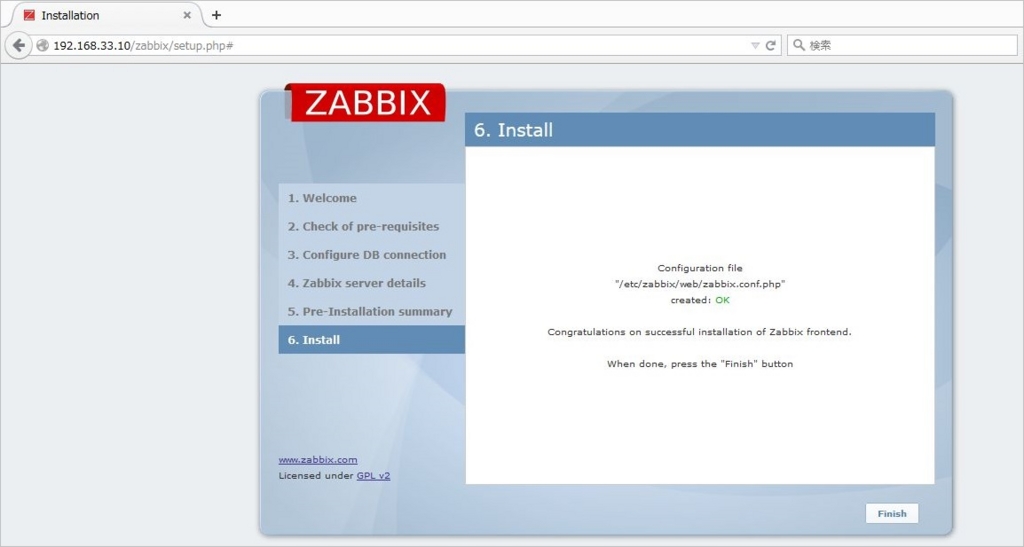
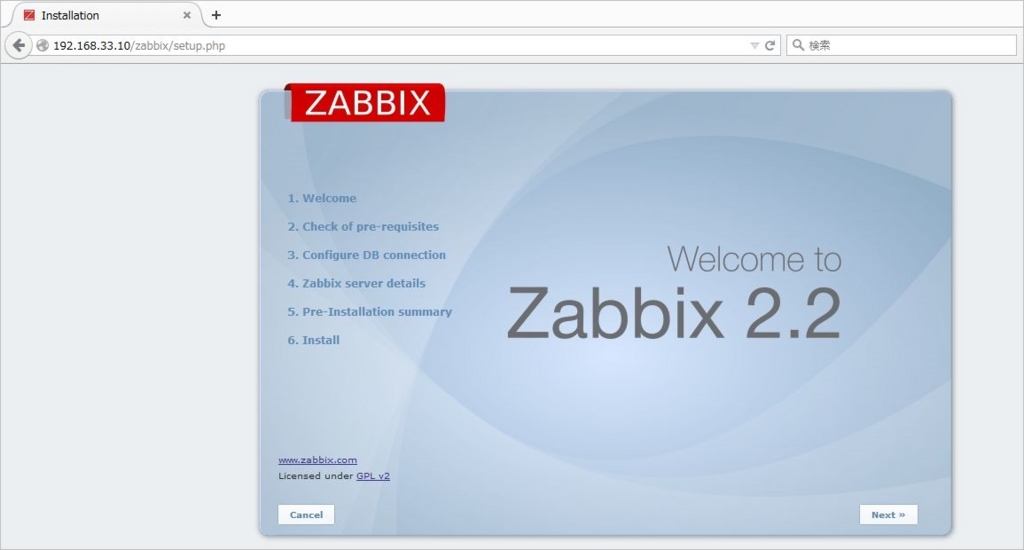
  • Version2.4の導入前に、2.2を入れたためにキャッシュが残っていたので、画面は「Welcome to Zabbix 2.2」となっていますw
f:id:no14141:20150702124316j:plain

f:id:no14141:20150702124324j:plain

f:id:no14141:20150702124331j:plain

f:id:no14141:20150702124339j:plain

f:id:no14141:20150702124348j:plain

f:id:no14141:20150702124354j:plain

これでセットアップは完了です!

http://192.168.33.10/zabbix/ へアクセスできるようになりました!!!


参考にさせていただいたサイト

TNKの気になること: ZabbixをCentOS 7にインストール

qiita.comCentOS7にZabbix2.2をインストール - Qiita

【AS400】RPGLE-数値日付の妥当性チェック

タイトルの件、やはり便利な命令が用意されていました。   これまでは、DSで年、月、日に分けて、閏年判定を交えて、オリジナル関数で処理させていましたが、TEST命令を使えば簡単に判定できることがわかりました。

サンプルはこちらです。

サンプルPGM

D MAIN            PR                  EXTPGM('SAMPLE37')    
D                                8P 0                       
D MAIN            PI                                        
D  P@YYMD                        8P 0                       
D*                                                          
 /FREE                                                      
     DSPLY P@YYMD;                                          
                                                            
    // 8桁日付                                             
     TEST(DE) *ISO P@YYMD;                                  
     IF %ERROR();                                           
         DSPLY ' パラメータ日付NG! ';                    
     ELSE;                                                  
         DSPLY ' パラメータ日付OK! ';                    
     ENDIF;                                                 
                                                            
    // 6桁日付                                             
     TEST(DE) *YMD P@YYMD;                                  
     IF %ERROR();                                           
         DSPLY ' パラメータ日付NG! ';   
     ELSE;                                 
         DSPLY ' パラメータ日付OK! ';   
     ENDIF;                                
                                           
     *INLR = *ON;                          
     RETURN;                               
 /END-FREE                                 

実行結果

> CALL PGM(TIGEROBJ/SAMPLE37) PARM(X'000150228F')   
  DSPLY    150228                                   
  DSPLY   パラメータ日付OK!                      
  DSPLY   パラメータ日付OK!                      
> CALL PGM(TIGEROBJ/SAMPLE37) PARM(X'020150229F')   
  DSPLY  20150229                                   
  DSPLY   パラメータ日付NG!                      
  DSPLY   パラメータ日付NG!                      
> CALL PGM(TIGEROBJ/SAMPLE37) PARM(X'000160229F') 
  DSPLY    160229                                 
  DSPLY   パラメータ日付OK!                    
  DSPLY   パラメータ日付OK!                    

【Excel】表Aのキーが表Bのキーに存在する場合、表Aの隣に表Bのレコードを出力する方法

タイトルにて、何を言いたいのか、うまく伝わらないような気がしてなりませんが、 ようするに、2つの表をキーでつないで、EXCEL上で並べてみたい! ただそれだけです。

ACCESSやらVBAなどを使わないで手軽にやる方法を調べました。

昔からあるVLOOKUP関数ですね。

すぐ忘れるので、備忘録としてここに残したいと思います。

f:id:no14141:20150629124436j:plain

今回、わかりやすく、表Aと表Bを同一上のシートに表現してあります。

表A=A2:C16

表B=H2:J8

※両方の表とも、キーを1列目としています。値に意味はありません。

D2の式

=VLOOKUP(A2,$H$2:$J$8,1,FALSE)

E2の式

=VLOOKUP(A2,$H$2:$J$8,2,FALSE)

F2の式

=VLOOKUP(A2,$H$2:$J$8,3,FALSE)

「#N/A」の結果は、表Bに存在していないという意味になります(Not Available)。

【Nexus】インハウス・リポジトリからのJarファイル取得

次に、Nexus上にアップロードしたファイルを取り込む方法です。

gradleプロジェクトで試してみました。

まずは、Repositoriesに自前Nexusの設定を追加しておきます。

repositories {
    mavenCentral()
    maven { 
      url "http://192.168.1.10:8081/nexus/content/repositories/releases"
    }
}

さらに、Dependenciesには、自作のjarファイルの設定を追記します。
保存しましたら、buildタスクを実行。

dependencies {
    compile(group: 'tigertaizo', name: 'test', version: '1.0')
}

タスク実行成功後、プロジェクト名で右クリックし、Dependenciesをリフレッシュ。

f:id:no14141:20150608130225j:plain

すると、Jarファイルが参照できるようになりました!

f:id:no14141:20150608130236j:plain

これで、メソッドの共通化が図れそうですね。 オッケー、オッケー!!

【Nexus】アーカイブ・ファイルのアップロード

前回、CentOS7のServerにNexus(OSS版)を無事にインストールできましたので、今回は、実際にJarファイルのアップロードと別プロジェクトから取得する方法を試したいと思います。

まずは、アップロードから。
とりあえず、セキュリティ的な設定は、何もしていない状態でのテストになりますので、実運用では注意が必要です。

WebからのJarファイル・アップロード

まずは、自分たちが開発したファイルを格納すべき「releases」のリポジトリを選択し、Jarファイルをアップロードします。

「Artifact Upload」タブを選択し、下記のような情報を入力。

f:id:no14141:20150608081740j:plain

さらに下へ進めると、Upload用ボタンがあるので、アップロードしたいファイルを選択し、「Add Artifact」ボタンを押すと、「Upload Artifact(s)」ボタンが押せるようになり、アップロードされます。

f:id:no14141:20150608081747j:plain

結果は、「Browse Index」で確認できました!

f:id:no14141:20150608081754j:plain

GradleタスクからのJarファイル・アップロード

今度は、Eclipseのgradleからアップロードしてみます。

下記のような「build.gradle」を準備し、「uploadArchives」を実行しましたら、見事成功!!

apply plugin: 'java'
apply plugin: 'eclipse'
apply plugin: 'maven'

sourceCompatibility = 1.8
targetCompatibility = 1.8
jar.baseName = 'test'
archivesBaseName = 'test' 
version = '1.0'
group = 'tigertaizo'

repositories {
  mavenCentral()
}
    
dependencies {
  compile 'com.google.guava:guava:18.0'
  testCompile group: 'junit', name: 'junit', version: '4.+'
}

test {
  systemProperties 'property': 'value'
}

jar {
  manifest {
    attributes 'Implementation-Title': 'Gradle Quickstart', 'Implementation-Version': version
    attributes "Main-Class" : "tigertaizo.Test03"
  }
  from configurations.compile.collect { it.isDirectory() ? it : zipTree(it) }
}

uploadArchives {
    repositories {
        mavenDeployer {
            repository(url: "http://192.168.1.10:8081/nexus/content/repositories/releases") { 
                authentication(userName: "admin", password: "**********")
            }
        }
    }
}

f:id:no14141:20150608081804j:plain

アップロード結果をWebで確認したところ、複数のファイルがアップロードされていることがわかりました。

f:id:no14141:20150608081815j:plain

いずれにしても、初期設定の状況ですが、簡単に共通ファイルをアップロードできることがわかりました。

次回は、Jarファイル取得方法について書きます。

【CentOS7】Nexusインストール

チームで共有して使用したいJarファイルを気軽に更新したり、取得したりできないものかと調査してましたら、「インハウス・リポジトリ」というワードにたどりつきました。

インハウス・リポジトリとは?

いわゆる社内リポジトリと呼ばれるもので、自分たちで作成したライブラリや外部リポジトリに存在しないライブラリを独自に準備した置き場所のことのようです。

インハウス・リポジトリの構築方法

基本的には、普通にHTTPアクセスできる場所を準備して、SCP、HTTP PUT、WebDAVなどでファイルをアップロードするようですが、簡単に導入できる管理ツールみたいのは無いのかなぁ~と調査したところ、次の3つが主流であることを知りました。

まずは、Glassfish4.1にwar配備できるのが超・楽!ということで、それぞれのwarファイルをデプロイしたところ、NexusとApache Archivaはデプロイエラーに!!!

というわけで、デプロイが成功したArtifactoryを数日、使ってみたのですが、今度はJarファイルをリポジトリにアップロードするタイミングで、毎回500エラーになる現象が発生。
初期化したり、いろいろと試してみたのですが、解決できずで。。。ログファイルにも、原因となるものが書き込まれていないし、こちらについても、Glassfish上での運用を諦めることにしました。

CentOS7へNexus導入

という経緯を経て、NexusをCentOSへインストールすることにしました。
Webで見た感じ、デザインも良さげでしたし!

(1) OSS版Nexusのダウンロード

(2) ファイルの設置

# mkdir /opt/nexus
  • SCPで下記のPATHへ配置
/opt/nexus/nexus-2.11.3-01-bundle.zip

(3) nexus展開、シンボリックリンク作成

# cd /opt/nexus
# unzip nexus-2.11.3-01-bundle.zip
# ls -l
合計 77968
drwxr-xr-x 8 root root      105  5月 19 18:06 nexus-2.11.3-01
-rw-r--r-- 1 root root 79837174  5月 28 08:20 nexus-2.11.3-01-bundle.zip
drwxr-xr-x 3 root root       35  5月 19 17:10 sonatype-work

# ln -s nexus-2.11.3-01 nexus
# ls -l
合計 77968
lrwxrwxrwx 1 root root       15  5月 28 12:35 nexus -> nexus-2.11.3-01
drwxr-xr-x 8 root root      105  5月 19 18:06 nexus-2.11.3-01
-rw-r--r-- 1 root root 79837174  5月 28 08:20 nexus-2.11.3-01-bundle.zip
drwxr-xr-x 3 root root       35  5月 19 17:10 sonatype-work

(4) nexusユーザー作成、権限付加

# useradd nexus

# id nexus
uid=1001(nexus) gid=1001(nexus) groups=1001(nexus)

# cd /opt/nexus
# chown -Rf nexus:nexus .
# ls -l
合計 77968
lrwxrwxrwx 1 nexus nexus       15  6月  1 12:44 nexus -> nexus-2.11.3-01
drwxr-xr-x 8 nexus nexus      105  5月 19 18:06 nexus-2.11.3-01
-rw-r--r-- 1 nexus nexus 79837174  5月 28 08:20 nexus-2.11.3-01-bundle.zip
drwxr-xr-x 3 nexus nexus       35  5月 19 17:10 sonatype-work

(5) 起動確認

# su - nexus
$ /opt/nexus/nexus/bin/nexus start
Starting Nexus OSS...
Started Nexus OSS.

http://[ServerのIPアドレス]:8081/nexus/ へアクセスすると、Nexusが起動しました! なお、私の環境では起動に数分かかりました。しばらく待ちましょう。

もし、Web画面が表示できない場合は、ファイアウォールの問題なので、8081ポートを開放してあげましょう。今回私はテスト用なので、ファイアウォールは無効にしてしまいました。

# systemctl stop firewalld
# systemctl disable firewalld


f:id:no14141:20150602083347j:plain

次回では、構築したNexusサーバを使用して、WebからのJarファイルのデプロイ、GradleタスクからのJarファイルのデプロイ、さらにはインハウス・リポジトリからのJar取得を試してみたいと思います。